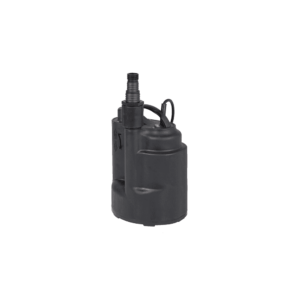
Your sump pump works tirelessly to protect your home from flooding, but it won’t last forever without proper maintenance. If you’ve noticed strange noises, slower drainage, or musty smells coming from your basement, it’s likely time for a thorough cleaning of your system. While the task might seem daunting, you’ll find that with the right tools and approach, maintaining your sump pump isn’t as complicated as you might think. Before you grab your tools and head to the basement, there are several critical steps you’ll need to take into account to guarantee both your safety and the effectiveness of your cleaning efforts.
Key Takeaways
- Unplug the sump pump and wear protective gear (gloves and mask) before beginning any cleaning work.
- Remove standing water and debris from the sump pit using a wet vacuum or shop vacuum.
- Clean pump components and pit walls with a vinegar-water solution, avoiding harsh chemicals that could damage the system.
- Inspect the float switch, non-return valve, and discharge pipe for damage or blockages while cleaning.
- Test the system by pouring clean water into the pit after reinstallation to ensure proper operation.
Understanding Your Sump Pump System
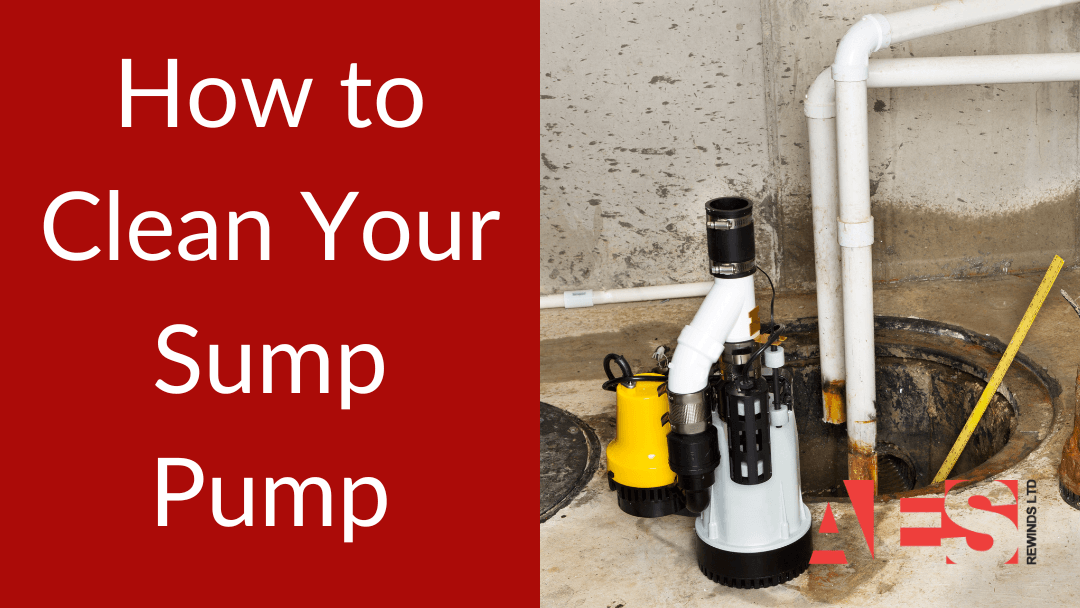
Your sump pump system is your home’s first line of defence against basement flooding. Before diving into maintenance and cleaning tasks, it’s essential to understand how your system works together to protect your home from water damage.
The heart of your system is the sump pit, which collects groundwater through connected weeping tiles buried around your home’s foundation. Submersible pump models are particularly effective for handling both clean and dirty water, making them versatile for various drainage needs.
When water fills the sump pit to a certain level, a float switch activates your sump pump, which then pushes the water out through a discharge pipe. This pipe should extend at least ten feet away from your house – think of it as giving unwanted water a one-way ticket out of your basement!
You’ll likely have either a submersible pump that sits inside the pit or a pedestal pump that operates above it. Both types need regular cleaning and maintenance to work effectively.
Understanding these components isn’t just about knowing how they work; it’s about recognising potential issues before they become problems. When you’re familiar with your system’s normal operation, you’ll be better equipped to spot when something’s not quite right and needs attention.
Essential Safety Precautions
Before touching any part of your sump pump system, safety must come first. Proper sump pump maintenance begins with protecting yourself from potential hazards such as electrical shock and contaminated water.
Whether you have a submersible or pedestal pump, regular cleaning is essential for optimal performance. The most critical step is to unplug the sump pump or switch off its dedicated circuit breaker before you commence any cleaning work.
You’ll want to equip yourself with heavy-duty gloves to shield your hands from debris and grey water that might be lurking in the pit.
Don’t forget to wear a protective mask too. Ensure you’ve got adequate lighting in your work area; a good torch or headlamp will help you spot any issues that might be hiding in the shadows.
Before you engage in cleaning, double-check that all systems connected to your sump pit are turned off and secured. You definitely don’t want any surprise water flows while you’re working!
Keep your workspace tidy and free from obstacles – stumbling around with cleaning equipment isn’t anyone’s idea of a good time.
Required Tools and Materials
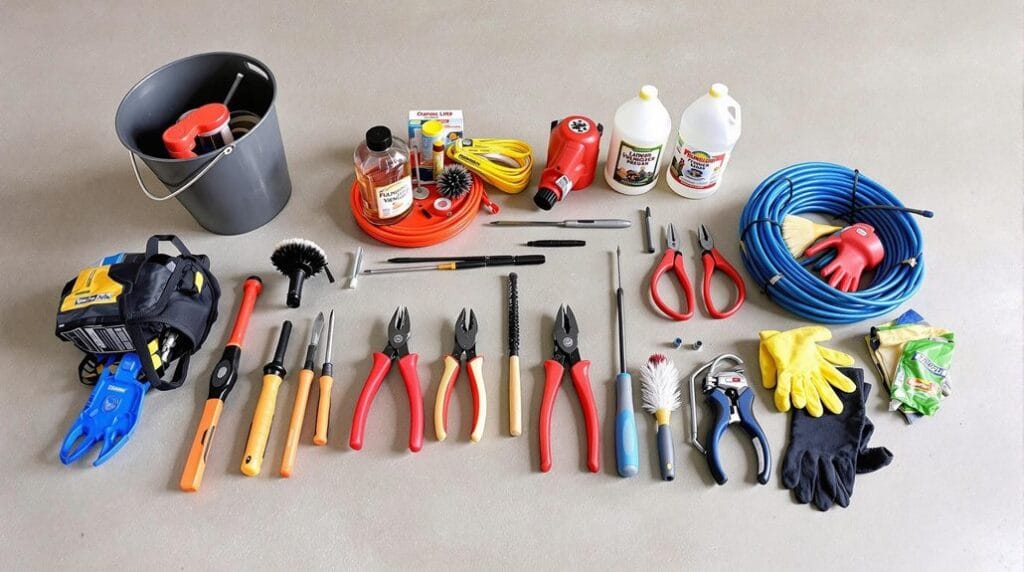
Before you start cleaning your sump pump, you’ll need to gather both safety equipment and basic cleaning supplies to do the job properly.
Since annual cleaning is vital for optimal performance, having the right tools on hand is important. Essential safety items include heavy-duty gloves to protect your hands and a protective mask to guard against potentially harmful contaminants in the water and debris.
You’ll also want to round up cleaning basics like a wet-vac for water removal, a plastic scraper for tough grime, a garden hose for rinsing, and a large plastic sheet to protect your work area.
Essential Safety Equipment
When tackling sump pump maintenance, proper safety equipment and cleaning tools are essential to protect yourself and complete the job effectively.
You’ll want to start by putting on a pair of heavy-duty gloves to shield your hands from harmful bacteria and contaminants that often lurk in sump pits. These gloves are your first line of defence when cleaning out your sump, so don’t skip this vital step.
A protective mask is another must-have item, as it’ll help you avoid breathing in unpleasant odours and potentially harmful particles that might become airborne during cleaning.
Since sump pits can be pretty dark, you’ll need a reliable torch or headlamp to see what you’re doing while you work.
Keep a bucket and plastic scraper nearby to collect debris and remove stubborn sludge that’s built up on surfaces.
Finally, have your garden hose ready for the final rinse-down of both the pump and pit.
With these safety measures in place, you’ll be well-equipped to handle the cleaning task while protecting yourself from potential hazards.
Basic Cleaning Supplies Needed
A successful sump pump cleaning job requires gathering the right tools and materials before you begin.
You’ll want to start with a sturdy bucket to collect debris from the pit and hold cleaning water. Don’t forget a plastic scraper or putty knife, which you’ll need to remove any stubborn sludge that’s built up on the sides or bottom of the pit.
For thorough cleaning supplies, you’ll need a garden hose to rinse everything down, and a wet-vac or shop-vac to remove standing water and guarantee a deep clean.
To protect your work area, lay down a large plastic sheet or tarp – trust me, you’ll be glad you did when it comes time to clean up!
Remember to prioritise your safety by having heavy-duty gloves and a protective mask on hand.
These items aren’t just cleaning supplies – they’re essential protection against contaminants and unpleasant odours you might encounter during the cleaning process.
Preparing the Work Area
Before you start cleaning your sump pump, you’ll need to put on your safety gear, including heavy-duty gloves and a face mask, to protect yourself from any harmful substances.
Next, clear out the basement area around your sump pit, making sure to remove any items that might get in your way or become damaged during the cleaning process.
Safety Equipment First
Safety must be your top priority when cleaning a sump pump. Before you even think about reaching into that pit, you’ll need to eliminate any risk of electrical shock by unplugging the unit or switching off its circuit breaker. Don’t skip this vital first step – it could save your life.
Next, you’ll want to gear up with the right protective equipment. Put on heavy-duty gloves to shield your hands from potentially harmful substances and debris that might be lurking in the pit. Since sump pits can harbour unpleasant odours and potentially harmful bacteria, wearing a protective mask isn’t just a suggestion – it’s a necessity.
You’ll also need proper lighting, so grab a torch or better yet, strap on a headlamp to keep both hands free while you work.
Before diving into the cleaning process, lay down a plastic sheet around your work area. This simple step will make cleanup much easier later.
Clear the basement space
Getting your workspace ready requires strategic planning and organisation. When you’re preparing to clear the basement space around your sump pump pit, you’ll want to remove any items that might get in your way during maintenance and cleaning.
Start by creating a clutter-free zone that gives you plenty of room to move and work efficiently.
Before diving into the cleaning process, make sure you’ve turned off and locked all appliances that drain into the sump pit. This simple step prevents any unexpected water flow while you’re working.
Next, lay down a plastic sheet or tarp to protect your basement floor – trust me, you’ll thank yourself later when cleanup becomes a breeze.
Take time to scan the area for any tools or debris that could become tripping hazards during your maintenance work.
Don’t forget about proper lighting – a good torch or headlamp is essential since sump pits tend to hide in those darker corners of your basement.
Position your light source where it won’t cast shadows on your work area.
With these preparations complete, you’ll have a safe, organised workspace that makes the cleaning process much more manageable.
Gather Essential Tools
A successful sump pump cleaning starts with the right tools at your fingertips. You’ll need a wet-vac or shop-vac to handle standing water, plus a sturdy bucket to collect any debris you find along the way. Don’t forget a plastic scraper – it’ll be your best friend when dealing with stubborn, caked-on sludge that’s accumulated in your pump.
Before you embark on the cleaning process, make sure you’ve got proper protection for yourself. Heavy-duty gloves and a mask aren’t optional – they’ll keep you safe from any unpleasant contaminants lurking in the pit.
You’ll also want to grab a garden hose for rinsing everything down once you’re done with the initial clean. A torch or headlamp is essential since you’ll be working in a dark space, and trust me, you’ll want both hands free for this job.
Cleaning the Sump Pit
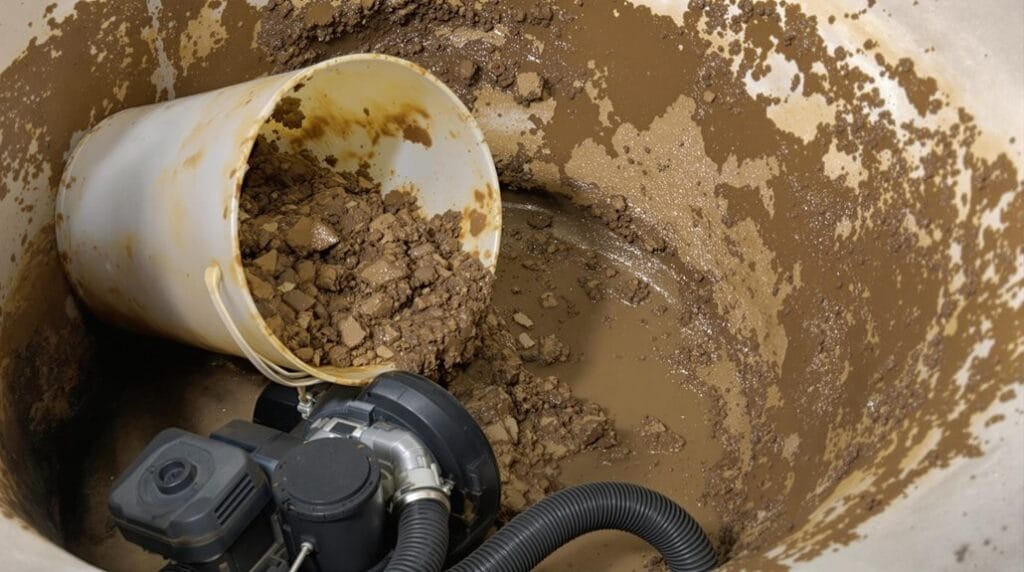
Regular maintenance of your sump pit helps prevent costly repairs and guarantees your pump operates at peak efficiency.
To clean out the sump properly, you’ll want to start by making sure all drainage systems connected to the pit are turned off and secured. Don’t forget to put on those heavy-duty gloves and a protective mask – you’ll thank yourself later!
Using your shop vac, remove any standing water and loose debris from the pit. While you’re at it, take a good look around for signs of wear or damage. Think of it as giving your sump pit a thorough health check-up.
Once you’ve cleared out the bulk of the mess, it’s time to tackle those grimy walls. Grab your cleaning solution and give the sides a proper scrubbing – this helps prevent future debris buildup and keeps things running smoothly.
After you’ve finished scrubbing, rinse everything thoroughly with clean water. Make sure you’ve removed all cleaning residues and let the pit dry completely before putting your pump back in place.
Maintaining the Pump Components
Now that your sump pit is clean, keeping the pump components in top shape requires focused attention on several key parts.
You’ll want to regularly inspect the float switch, making sure it’s free from debris that could prevent proper activation when water levels rise. This simple check can save you from potential flooding headaches down the line.
When it comes to cleaning your sump pump components, stick to a gentle vinegar-water solution.
Don’t be tempted to use harsh chemicals, as they can damage the pump’s essential parts. Pay special attention to the check valve, which prevents water from flowing back into the pit after pumping. You’ll need to inspect it carefully for wear and tear during your maintenance routine.
Don’t forget about the discharge pipe – it’s important to keep it clear of any blockages that could impede water flow.
Once you’ve finished cleaning everything, take extra care when reconnecting the pump and power supply. Double-check that all components are properly secured to prevent leaks and confirm your sump pump operates at peak efficiency.
Signs of Pump Damage
Physical signs of damage to your sump pump can include rust spots, visible cracks, or dents in the casing that you’ll want to check during regular inspections.
You’ll also need to listen for grinding, scraping, or rattling sounds that could signal internal component issues while the pump is running.
These warning signs, along with any vibrations that seem unusual, shouldn’t be ignored since they often point to serious mechanical problems that could lead to pump failure.
Physical Wear Indicators
Identifying early signs of wear on your sump pump can prevent catastrophic failures during heavy rains or floods. When inspecting your unit, start by examining the pump’s casing for any visible cracks or dents that might compromise its performance. These physical wear indicators often signal that it’s time for maintenance or possible replacement.
While your pump is running, listen carefully for any unusual sounds. If you hear grinding, rattling, or other concerning noises, it’s likely warning you about internal components that need attention.
You’ll also want to check for water leaks around the base and connections of your sump pump, as these can point to failing seals that require immediate repair.
Don’t forget to test your float switch by gently moving it up and down – if it’s not moving freely, you might need to clean or replace it.
Unusual Operating Sounds
Beneath the steady hum of a healthy sump pump lies a language of sounds that can alert you to potential problems. As you clean your sump pump, it’s essential to listen for any unusual operating sounds that might indicate trouble brewing beneath the surface. Think of these sounds as your pump’s way of sending an SOS signal before major issues develop.
Here are the key sounds you shouldn’t ignore:
- Grinding or rattling noises that suggest worn bearings or damaged impellers.
- Continuous humming without water movement, indicating possible clogs.
- Clicking sounds that point to float switch problems.
When you hear these warning signs, don’t wait to take action. While regular cleaning and maintenance can prevent many issues, persistent unusual sounds require professional attention.
You might be tempted to ignore these noises and hope they’ll resolve themselves, but that’s rarely the case. Instead, contact a professional plumber who can properly diagnose and fix the underlying problems.
If you need a replacement sump pump we have a range available at AES Rewinds, or give our team a call if you need advice.
-
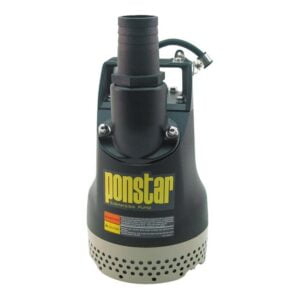
%27%20fill-opacity%3D%27.5%27%3E%3Cellipse%20fill%3D%22%23272725%22%20fill-opacity%3D%22.5%22%20rx%3D%221%22%20ry%3D%221%22%20transform%3D%22rotate(-5.6%201625.4%20-1372.3)%20scale(52.64483%20121.72137)%22%2F%3E%3Cellipse%20fill%3D%22%23fff%22%20fill-opacity%3D%22.5%22%20rx%3D%221%22%20ry%3D%221%22%20transform%3D%22matrix(-13.96388%20-298.50169%2052.69032%20-2.46485%20262%20127.9)%22%2F%3E%3Cellipse%20fill%3D%22%23fff%22%20fill-opacity%3D%22.5%22%20rx%3D%221%22%20ry%3D%221%22%20transform%3D%22matrix(-9.00505%20298.69241%20-42.15143%20-1.2708%2034.6%20121.9)%22%2F%3E%3Cellipse%20fill%3D%22%23454642%22%20fill-opacity%3D%22.5%22%20rx%3D%221%22%20ry%3D%221%22%20transform%3D%22matrix(28.07716%20-1.9693%206.02718%2085.93193%20141.5%20149)%22%2F%3E%3C%2Fg%3E%3C%2Fsvg%3E) Koshin Ponstar PX 55011 110v Automatic Submersible Pump£349.15 +VAT
Koshin Ponstar PX 55011 110v Automatic Submersible Pump£349.15 +VAT -
%27%20fill-opacity%3D%27.5%27%3E%3Cellipse%20fill%3D%22%23272725%22%20fill-opacity%3D%22.5%22%20rx%3D%221%22%20ry%3D%221%22%20transform%3D%22rotate(-5.6%201625.4%20-1372.3)%20scale(52.64483%20121.72137)%22%2F%3E%3Cellipse%20fill%3D%22%23fff%22%20fill-opacity%3D%22.5%22%20rx%3D%221%22%20ry%3D%221%22%20transform%3D%22matrix(-13.96388%20-298.50169%2052.69032%20-2.46485%20262%20127.9)%22%2F%3E%3Cellipse%20fill%3D%22%23fff%22%20fill-opacity%3D%22.5%22%20rx%3D%221%22%20ry%3D%221%22%20transform%3D%22matrix(-9.00505%20298.69241%20-42.15143%20-1.2708%2034.6%20121.9)%22%2F%3E%3Cellipse%20fill%3D%22%23454642%22%20fill-opacity%3D%22.5%22%20rx%3D%221%22%20ry%3D%221%22%20transform%3D%22matrix(28.07716%20-1.9693%206.02718%2085.93193%20141.5%20149)%22%2F%3E%3C%2Fg%3E%3C%2Fsvg%3E) Koshin Ponstar PX 55011 110v Manual Submersible Pump£321.55 +VAT
Koshin Ponstar PX 55011 110v Manual Submersible Pump£321.55 +VAT -
%27%20fill-opacity%3D%27.5%27%3E%3Cellipse%20fill%3D%22%23272725%22%20fill-opacity%3D%22.5%22%20rx%3D%221%22%20ry%3D%221%22%20transform%3D%22rotate(-5.6%201625.4%20-1372.3)%20scale(52.64483%20121.72137)%22%2F%3E%3Cellipse%20fill%3D%22%23fff%22%20fill-opacity%3D%22.5%22%20rx%3D%221%22%20ry%3D%221%22%20transform%3D%22matrix(-13.96388%20-298.50169%2052.69032%20-2.46485%20262%20127.9)%22%2F%3E%3Cellipse%20fill%3D%22%23fff%22%20fill-opacity%3D%22.5%22%20rx%3D%221%22%20ry%3D%221%22%20transform%3D%22matrix(-9.00505%20298.69241%20-42.15143%20-1.2708%2034.6%20121.9)%22%2F%3E%3Cellipse%20fill%3D%22%23454642%22%20fill-opacity%3D%22.5%22%20rx%3D%221%22%20ry%3D%221%22%20transform%3D%22matrix(28.07716%20-1.9693%206.02718%2085.93193%20141.5%20149)%22%2F%3E%3C%2Fg%3E%3C%2Fsvg%3E) Koshin Ponstar PX 55022 230v Automatic Submersible Pump£349.15 +VAT
Koshin Ponstar PX 55022 230v Automatic Submersible Pump£349.15 +VAT -
%27%20fill-opacity%3D%27.5%27%3E%3Cellipse%20fill%3D%22%23272725%22%20fill-opacity%3D%22.5%22%20rx%3D%221%22%20ry%3D%221%22%20transform%3D%22rotate(-5.6%201625.4%20-1372.3)%20scale(52.64483%20121.72137)%22%2F%3E%3Cellipse%20fill%3D%22%23fff%22%20fill-opacity%3D%22.5%22%20rx%3D%221%22%20ry%3D%221%22%20transform%3D%22matrix(-13.96388%20-298.50169%2052.69032%20-2.46485%20262%20127.9)%22%2F%3E%3Cellipse%20fill%3D%22%23fff%22%20fill-opacity%3D%22.5%22%20rx%3D%221%22%20ry%3D%221%22%20transform%3D%22matrix(-9.00505%20298.69241%20-42.15143%20-1.2708%2034.6%20121.9)%22%2F%3E%3Cellipse%20fill%3D%22%23454642%22%20fill-opacity%3D%22.5%22%20rx%3D%221%22%20ry%3D%221%22%20transform%3D%22matrix(28.07716%20-1.9693%206.02718%2085.93193%20141.5%20149)%22%2F%3E%3C%2Fg%3E%3C%2Fsvg%3E) Koshin Ponstar PX 55022 230v Manual Submersible Pump£321.55 +VAT
Koshin Ponstar PX 55022 230v Manual Submersible Pump£321.55 +VAT -
%27%20fill-opacity%3D%27.5%27%3E%3Cellipse%20fill%3D%22%23272725%22%20fill-opacity%3D%22.5%22%20rx%3D%221%22%20ry%3D%221%22%20transform%3D%22rotate(-5.6%201625.4%20-1372.3)%20scale(52.64483%20121.72137)%22%2F%3E%3Cellipse%20fill%3D%22%23fff%22%20fill-opacity%3D%22.5%22%20rx%3D%221%22%20ry%3D%221%22%20transform%3D%22matrix(-13.96388%20-298.50169%2052.69032%20-2.46485%20262%20127.9)%22%2F%3E%3Cellipse%20fill%3D%22%23fff%22%20fill-opacity%3D%22.5%22%20rx%3D%221%22%20ry%3D%221%22%20transform%3D%22matrix(-9.00505%20298.69241%20-42.15143%20-1.2708%2034.6%20121.9)%22%2F%3E%3Cellipse%20fill%3D%22%23454642%22%20fill-opacity%3D%22.5%22%20rx%3D%221%22%20ry%3D%221%22%20transform%3D%22matrix(28.07716%20-1.9693%206.02718%2085.93193%20141.5%20149)%22%2F%3E%3C%2Fg%3E%3C%2Fsvg%3E) Koshin Ponstar PX Submersible PumpsFrom £321.55
Koshin Ponstar PX Submersible PumpsFrom £321.55 -
 Pentair Flotec Compac 200 (DPC) 230v Submersible Pump£243.58 +VAT
 -
 Pentair Flotec Compac 150 110v Submersible Pump£214.60 +VAT
 -
 Pentair Flotec Compac 150 230v Submersible Pump£214.60 +VAT
 -
%27%20fill-opacity%3D%27.5%27%3E%3Cellipse%20fill%3D%22%23575757%22%20fill-opacity%3D%22.5%22%20rx%3D%221%22%20ry%3D%221%22%20transform%3D%22matrix(-8.17173%20-72.82652%2054.25951%20-6.08836%20144.6%20160.6)%22%2F%3E%3Cellipse%20fill%3D%22%23585858%22%20fill-opacity%3D%22.5%22%20rx%3D%221%22%20ry%3D%221%22%20transform%3D%22matrix(-3.63357%20-42.38378%2030.71439%20-2.63315%20146%20162)%22%2F%3E%3Cellipse%20fill%3D%22%23fff%22%20fill-opacity%3D%22.5%22%20rx%3D%221%22%20ry%3D%221%22%20transform%3D%22rotate(80.1%2044.3%20233.8)%20scale(298.82813%2083.61165)%22%2F%3E%3Cellipse%20fill%3D%22%23fff%22%20fill-opacity%3D%22.5%22%20rx%3D%221%22%20ry%3D%221%22%20transform%3D%22matrix(8.617%20269.45255%20-56.88968%201.81931%2047.6%20156.6)%22%2F%3E%3C%2Fg%3E%3C%2Fsvg%3E) Pentair Flotec Compac 150 & 200 Submersible (Sump) PumpsFrom £214.60
Pentair Flotec Compac 150 & 200 Submersible (Sump) PumpsFrom £214.60
Proper Cleaning Solutions
Several effective cleaning solutions can help maintain your sump pump’s performance while ensuring its longevity.
When you’re ready to clean a sump pump, a mixture of equal parts water and vinegar serves as an excellent solution for tackling tough grime. Apply this mixture to the sump pit and let it sit for 20 minutes before rinsing thoroughly with clean water.
If you’re dealing with unpleasant odours, you can use a mixture of 250ml of bleach per 4 litres of water – but only if you don’t have a septic system. Run your pump after adding this solution to help distribute it effectively.
However, remember that vinegar or bleach should never be poured directly into the pump itself, as it can damage internal components.
Whatever recommended cleaning solution you choose, thorough rinsing is essential to prevent any residue from affecting your pump’s operation.
It’s also wise to check your pump’s manual for manufacturer-specific guidelines, as some models may have special requirements or restrictions.
Reinstallation Best Practices
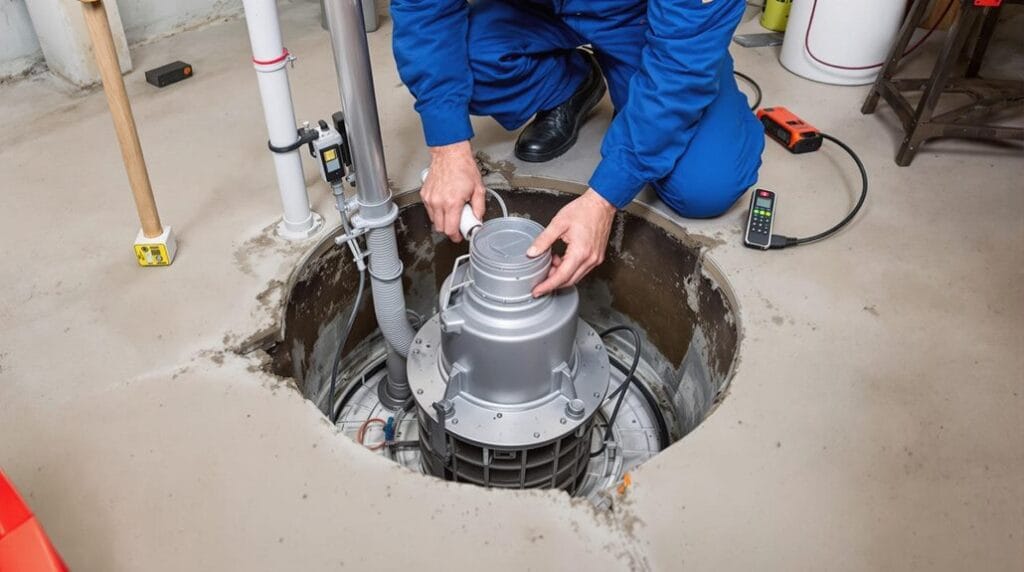
A successful sump pump reinstallation requires careful attention to detail and proper positioning. Before you put your pump back in place, make certain the sump pit is completely dry and free of debris. You’ll want to start with a clean slate to guarantee peak performance and prevent any future issues with your pump’s operation.
Here are three critical steps you can’t afford to skip:
- Position your pump carefully in the centre of the pit, ensuring it’s stable and the float switch can move freely.
- Reconnect the discharge pipe with proper alignment to prevent any potential leaks.
- Test the system with clean water before considering the job complete.
When you’re ready to power up your pump, double-check all connections before plugging it in or turning on the circuit breaker.
Add enough water to the pit to test the pump’s activation and confirm it’s working properly. Don’t rush this final step – watching your pump complete a full cycle will give you peace of mind that everything’s functioning as it should.
Professional Maintenance Guidelines
Your sump pump’s longevity depends heavily on professional maintenance, which should be scheduled at least once annually. This is particularly important after periods of heavy rainfall or when spring’s snowmelt puts extra strain on your system.
During these check-ups, you’ll gain peace of mind knowing that experienced technicians are thoroughly inspecting critical components.
When professionals clean out your sump pump, they’ll examine the float switch, discharge pipe, and non-return valve to guarantee everything’s functioning as it should. They’ll use specialised cleaning solutions like CLR to tackle mineral buildup without risking damage to your pump’s components.
If your pump shows signs of continuous operation when there’s no water present, they can diagnose and address the underlying issues before they become major problems.
Don’t forget to keep detailed records of your professional maintenance visits. These records are invaluable for tracking your pump’s performance over time and will help you make informed decisions about repairs or replacement.
Think of it as your pump’s medical history – the more information you have, the better equipped you’ll be to maintain its health and extend its lifespan.
Frequently Asked Questions
What Can I Use to Clean My Sump Pump?
You can use a 1:1 water-vinegar mix for scrubbing, or mix bleach (250ml to 4 litres of water) with water for odours. CLR is also effective for removing build-up. Always rinse thoroughly with clean water after cleaning your pump.
How Do You Clean Sludge Out of a Sump Pump?
You’ll need to unplug the pump, use a plastic scraper to remove heavy sludge build-up, then rinse thoroughly with a garden hose. Don’t forget to disinfect with a vinegar solution afterwards.
How Often Should a Sump Pump Be Cleaned?
You’ll need to clean your sump pump at least once a year, but if it’s in an uncovered pit or experiences heavy rainfall, clean it every six months to maintain optimal performance.
Is Bleach or Vinegar Better for a Sump Pump?
Vinegar is your better choice for cleaning sump pumps since it’s less corrosive than bleach. You’ll protect pump components while effectively removing grime and odours. Mix it 1:1 with water for safe, thorough cleaning and rinse it through afterwards.
Conclusion
Regular sump pump maintenance isn’t just about keeping things clean – it’s about protecting your home from water damage. Now that you’ve learned the proper cleaning steps, you’ll want to make this a part of your quarterly home maintenance routine. Remember, if you’re ever unsure about tackling the job yourself, don’t hesitate to call a professional. A well-maintained sump pump is your best defence against basement flooding.

